API v0.5 to v2.0 Migration Guide
Migrate your SheerID API integration from v0.5 to v2.0.
Background
In 2019 we released SheerID 2.0 - the latest version of the SheerID platform and API which brings enhanced speed, reliability, security, and ease of implementation. These changes leverage new technologies that deliver a better experience to your end users.
We also simplified our APIs, making development easier for our engineers and customers.
And most importantly, we launched our self-service portal, My.SheerID.com, allowing you to create, configure, and customize your verification programs in one easy-to-use interface.
If you are using our v0.5 API today, this document will help guide you through the necessary steps to migration your verification program(s) to MySheerID.
Resources
- v2.0 REST API Reference
- v2.0 API Walkthrough Tutorial
- v0.5 REST API Reference
- Product Deprecation Schedule
Why Migrate?
SheerID 2.0 benefits include:
- A simplified API to make implementation faster and easier
- MySheerID, a self-service platform for managing programs
- Advanced fraud protections
- International options
- Default re-engagement features
- Conversion tracking and ROI dashboards
Let’s get started!
V2.0 Concepts
The SheerID 2.0 Platform/API represents a leap forward for our API users, simplifying calls to our service and enabling configuration of new features in our self-service portal, MySheerID.
Before getting started, please take a moment to read How it Works for an overview of the new 2.0 workflow, then return here to continue.
MySheerID
Our new self-service portal, MySheerID, is your one-stop shop for program creation, configuration, reporting, customer service and more. You may now manage many features in MySheerID that you used to rely on SheerID to configure, such as:
- Approval/Rejection email copy
- Webhook URLs
- Enabling a marketing consent checkbox
Program ID and Verification ID Do the Heavy Lifting
When you create a program in MySheerId, a programId is generated, a unique string
that you will use to initiate verifications. A success response returns a verificationId representing an individual user verification, which you will use to perform and track verifications over time.
Retrieve your programId from your Program tab in MySheerID.

The programId knows everything about your program configuration such as segment and affiliation types, offer codes, etc. The verificationId is tied to the programId, so apart from the collect info step, you will never need to send us data that is already encoded in these identifiers.
Combined Test and Live Environments
We no longer maintain a separate sandbox testing environment with its own URL. All new programs are created in Test mode. When you are ready to launch your program, you will switch to Live mode.
Details on taking your program live are provided in the Launch section towards the end of this guide.
Setup
Let’s get started. In this section, you will access your MySheerID account and generate a new program as a target for your migration.
Access Your Account
The migration process takes place completely within MySheerID. If you have your credentials to our legacy client portal at services.sheerid.com, use them to log in to MySheerId.
If you do not have your login credentials, contact our Support team at [email protected] to retrieve them.
Create Program
Once logged in to your MySheerID account, click the Create Verification Program button in the upper-right hand corner to begin.
-
Select the program segment that aligns with your offer:
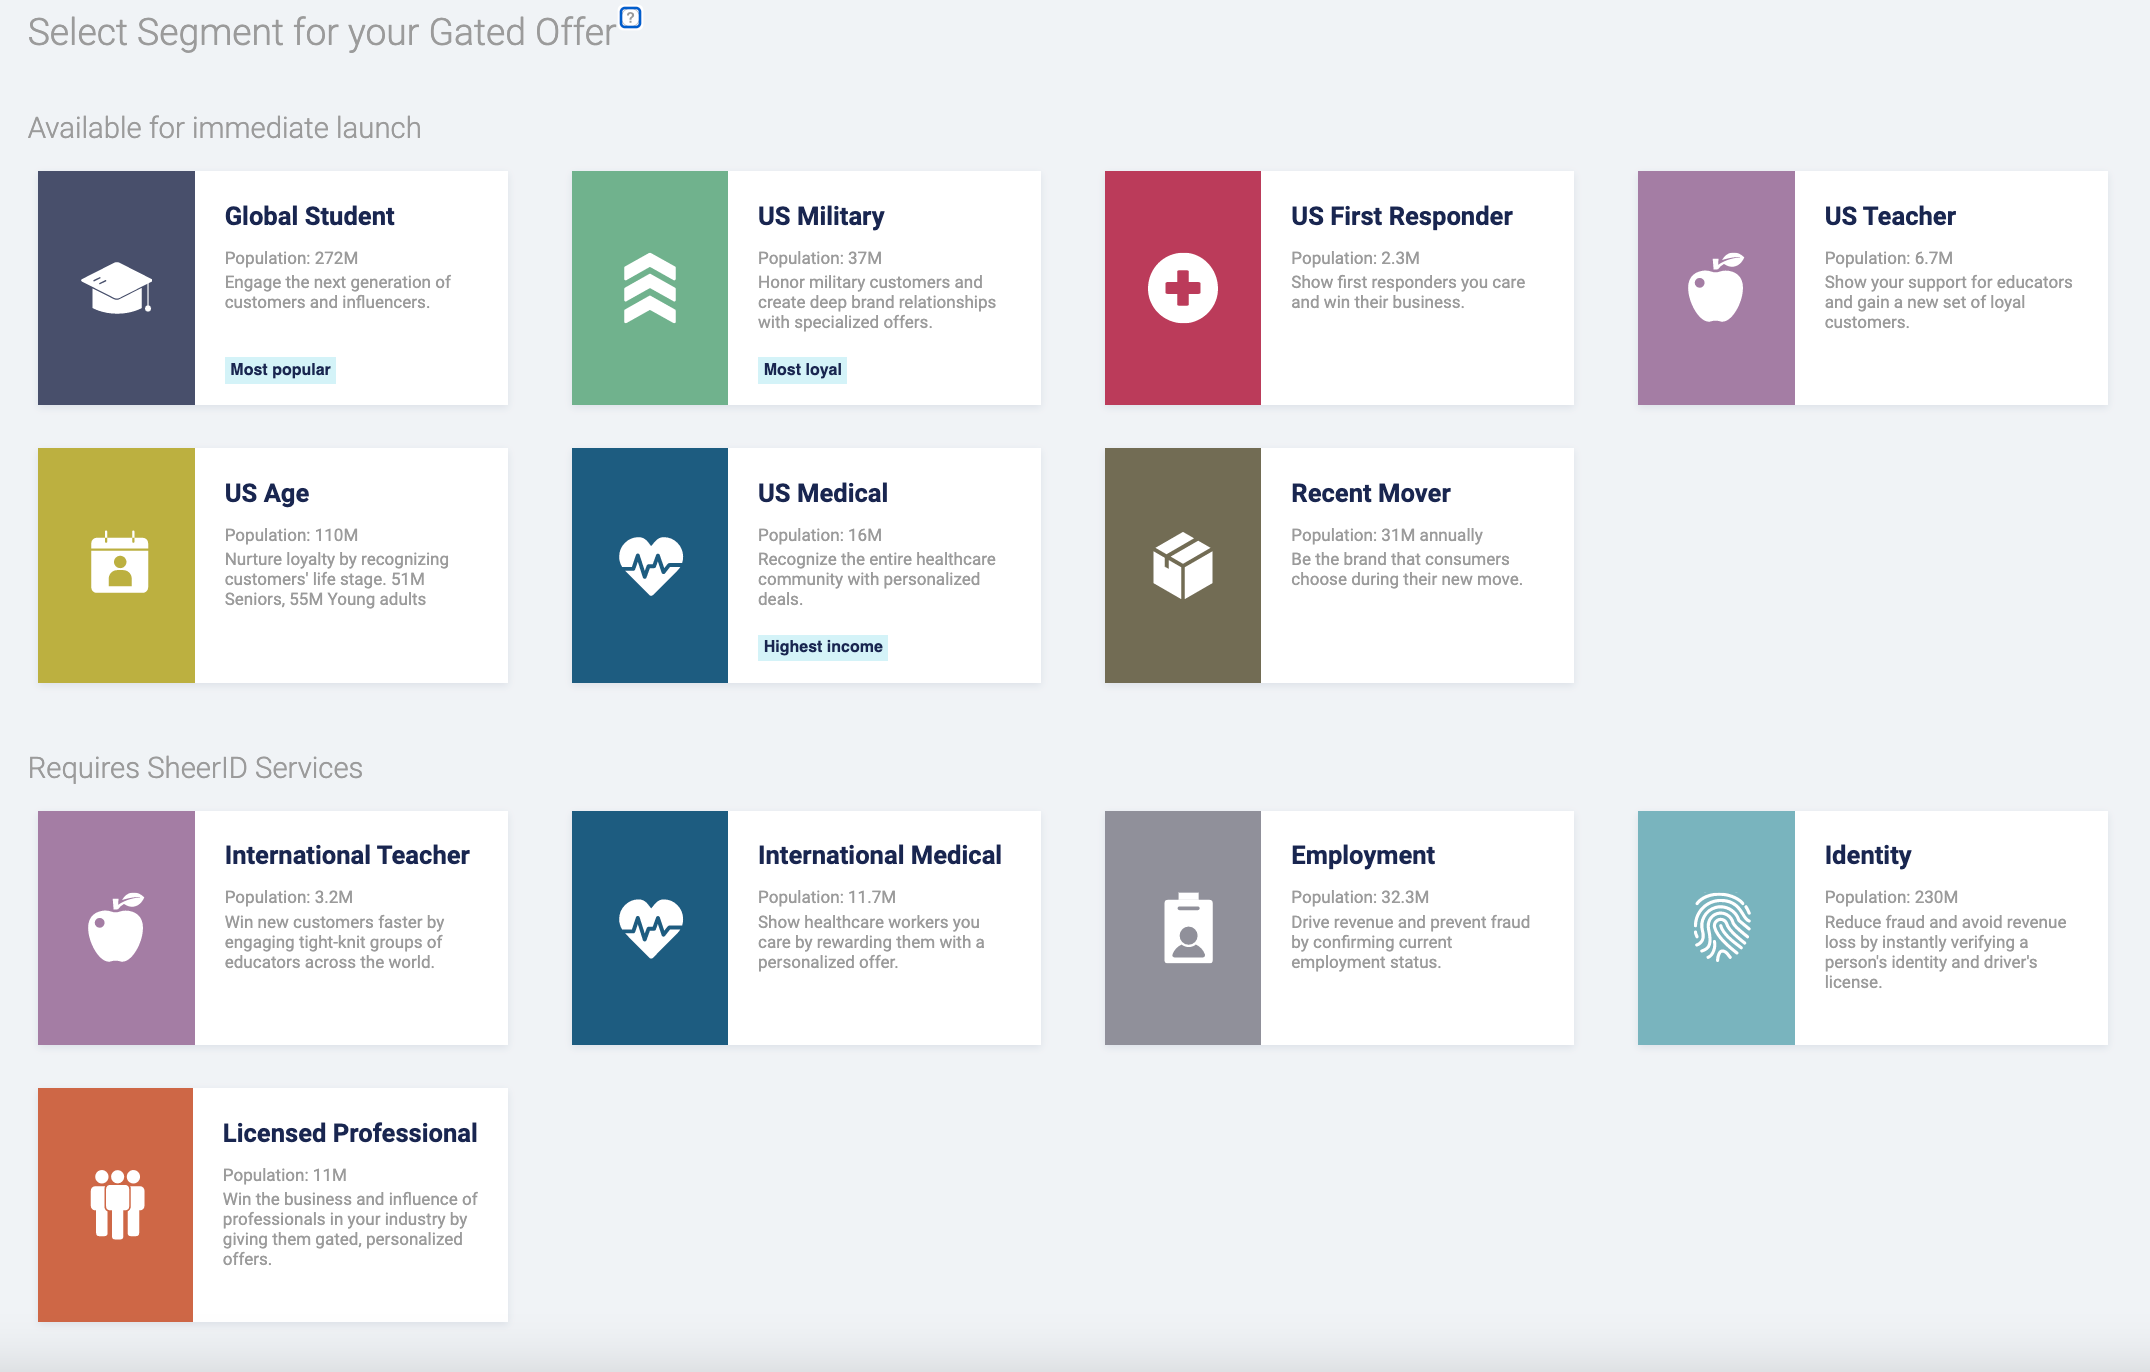
-
Customize the copy for the collect info, success confirmation, and document upload steps in your verification flow. See Customize Text for details on this step. Click Next.
-
In the Theme section, leave the default UI customization values in place since you will be using your web form. Click Next.
-
Upload your offer codes.
-
Click Save. Now you wil have access to your
programId.
Configure 2.0 Settings
Once you have gone through the initial setup and saved your program, a Settings tab will appear at the top of your program page. This is where you will configure additional messaging, limits, metadata, links, and more for your program.

As indicated above, our 2.0 platform makes integration and development simpler for our customers and partners. Our goal is to streamline your development process wherever possible by enabling new (and old!) features in our cloud infrastructure.
We encourage you to review all of the available settings in MySheerID. But first we’d like to call out some of the key features that you will likely need to migrate during this process:
- Emails: Modify all of your approved and rejected email copy in the Emails configuration section.
- Metadata: Define key/value pairs that you wish to track for your verifications. These metadata will appear as column headers in your verification reports.
- Allowed Domains: Specify one or more domains that are allowed when the SheerID system processes a verification attempt or conversion attempt.
- SMS Notifier: Notify users by SMS when uploaded documents are approved. This setting adds phone number collection to your form.
Map 0.5 to 2.0 Endpoints
The best way to familiarize yourself with our v2.0 API is to read our API Walkthrough tutorial.
After reading the tutorial, return here for a high-level overview of key differences between 0.5 and 2.0.
Base URL
The version number in the base URL has been updated to 2.0.
| v0.5 | v2.0 |
|---|---|
https://services.sheerid.com/rest/0.5/ |
https://services.sheerid.com/rest/v2/ |
Verification
In v0.5, you use the POST /rest/0.5/verification endpoint to perform a verification, including personal information on the user, affiliation types, and your template configuration.
In 2.0, the request body is simpler, requiring only a programId and an optional trackingId to initiate the verification:
POST /rest/v2/verification HTTP/1.1
Host: services.sheerid.com
Content-Type: application/json

{
    "programId": "5cc3302131ce7e06e3689eff",
    "trackingId": "userId_123"
}
trackingId to tie a verification to an ID from your internal systems.
A success response will provide you with your new currentStep and the values for verificationId and submissionUrl that you need to proceed to the next step.
200 OK, not a successful verification! You may well get a 200 HTTP response but still have some work to do if the currentStep is docUpload. This is your friendly reminder to review the Submission Request section of our API walkthrough if you have not already.
HTTP/1.1 200 OK
Content-type: application/json

{
    "verificationId": "5c884a8fc7e5d8109070bf3f",
    "currentStep": "collectStudentPersonalInfo",
    "submissionUrl": "https://services.sheerid.com/rest/v2/verification/5c884a8fc7e5d8109070bf3f/step/collectStudentPersonalInfo",
    "errorIds": [],
    "segment": "student",
    "subSegment": null
}
Verification Status and Details
To get the status of a verification, instead of using the requestId, use the verificationId.
We have also introduced a /details option so that you can retrieve the full picture on a verification
including program info and other details. If you only need the status from the lastResponse, then
just pass the verificationId without /details.
| v0.5 | v2.0 | |
|---|---|---|
| Status | GET /rest/0.5/verification/{requestId} |
GET /rest/v2/verification/{verificationId} |
| Details | N/A | GET /rest/v2/verification/{verificationId}/details |
Example responses:
GET /verification/{verificationId}
{
    "verificationId": "607d9faba4121969d462620d",
    "currentStep": "collectStudentPersonalInfo",
    "errorIds": [],
    "segment": "student",
    "subSegment": null,
    "locale": "en-US",
    "submissionUrl": "https://services.sheerid.com/rest/v2/verification/607d9faba4121969d462620d/step/collectStudentPersonalInfo",
    "instantMatchAttempts": 0
}
GET /verification/{verificationId}/details
{
    "programId": "5d2616be99b87a20801c095c",
    "trackingId": "",
    "personId": "5c4cd1c4d1d29610aafda218",
    "created": 1618845611590,
    "updated": 1618845611590,
    "lastResponse": {
        "verificationId": "607d9faba4121969d462620d",
        "currentStep": "collectStudentPersonalInfo",
        "errorIds": [],
        "segment": "student",
        "subSegment": null,
        "locale": "en-US",
        "submissionUrl": "https://services.sheerid.com/rest/v2/verification/607d9faba4121969d462620d/step/collectStudentPersonalInfo",
        "instantMatchAttempts": 0
    },
    "personInfo": null,
    "docUploadRejectionCount": 0,
    "docUploadRejectionReasons": []
}
Update a verification
In v0.5, you use the POST /verification/{requestId} to update and resubmit an existing verification if the request had a result of null.
This method is deprecated in 2.0 as identity data is handled only in the collectPersonalInfo steps, not the initial verification.
Document Upload and Review
In 0.5 we provide two endpoints for uploading assets for document review. The two-step process involves
first issuing a token that you need to submit the document, then performing a POST request with
the file and the token.
POST /asset/token: Issue tokenPOST /asset: Upload an asset
In 2.0, this process is simplified.
When your verification advances to the docUpload step, i.e., after an unsuccessful instant verification, the submissionUrl is returned:
{
    "verificationId": "6079ba7a3fe751368932dc18",
    "currentStep": "docUpload",
    "errorIds": [],
    "segment": "student",
    "subSegment": null,
    "locale": "en-US",
    "submissionUrl": "https://services.sheerid.com/rest/v2/verification/6079ba7a3fe751368932dc18/step/docUpload",
    "rejectionReasons": [],
    "maxReviewTime": "20_MIN",
    "estimatedReviewTime": "A_FEW_MINUTES"
}
Submit a POST request to that endpoint to begin the doc upload process, as described in the API documentation for that endpoint.
It is not necessary to provide a doc upload token when calling this endpoint.
Required Fields
In v0.5, we provide two endpoints that you can use to list the required fields for either:
- A verification type or multiple types:
GET /required_fields - A specific verification template:
GET /required_fields/template/{templateId}
In 2.0, we do not provide listing endpoints for required fields. See Required Fields for a listing of fields for you verification type.
Required fields are also available in our REST API 2.0 Reference and our OpenAPI specification.
Launch
When you are ready to launch your program, initiate a request to publish it by clicking the Go Live button beneath the code snippet on your program’s Program page. This action will engage our Account and Client Delivery teams to ensure that your Services Agreement is in place and to perform a quality review of your program.
See Test Your Program for details.
Post-launch
Congratulations! You have successfully launched your MySheerID program. Now you can take advantage of all the new and upcoming features that this next-generation platform has to offer.
Here are a few resources to help you get the most out of your new program and to keep up-to-date on new SheerID offerings:
-
Reporting Dashboard: Analyze trends and measure the effectiveness of your SheerID programs.
-
Customer Service Search: Use our customer service search tool to get details on individual verification records.
Product Deprecation Schedule
See our Product Deprecation Schedule for platform version status and end-of-life dates.